
Human Resources
TMS Guide
1. Accessing the System
The TMS system is web based and is accessed by typing the following address into the browser on the pc
Once the address is typed in, the following page should be displayed:
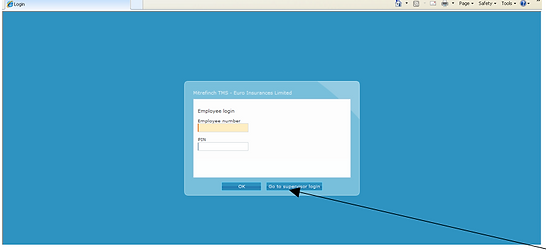
To access the system as a supervisor, click the ‘go to supervisor login’ button and type in the username and password supplied by the System Administrator.

Once logged in a ‘dashboard’ will be displayed with access to different parts of the system.
For security reasons- only one person has access to add persons to the managers’ view and that is the HR Director.
2. Change PIN
Clicking on the change pin icon allows you to change the 4 digit security pin used for accessing the system. Please remember your pin.

If you forget your Supervisor PIN and are not able to login you will need to contact the HR Director for a reset.
3. Searching for Employees
3.1. Select an employee
To view or edit the details of an individual employee from all those that report to you, you must first select the required employee.
If you know the required employee's name, the easiest way to select him or her is to use the dropdown list marked Employee, at the top of the screen.
To select the previous or next employee in the list, use the drop down arrow to the right of the list.
3.2 Find
Should you know some details about an employee, e.g. employee number, without knowing the employee's full name, you can find the required person by clicking on the Find/Search (magnifying glass) icon.
The box below will appear.

Enter the details you know into the relevant boxes (you can also enter part-details, e.g., if you know only that an employee's reference number begins with 22, then entering this into the Personnel ref box will display all those whose numbers contain '22'), then click enter or Find, which will bring up a list of all employees matching those criteria:
Select the required employee, then click OK, and the selected employee will be displayed in the Employee drop-down list.
If a staff member moves roles they get updated in TMS and assigned to the new manager on the effective start date of their new role.
4. Absence Planning – holidays/sick leave/sales trips etc.
Every employee in TMS will have an annual leave and other entitlements. Although employees will have the ability to request leave for themselves, from time to time Supervisors will need to insert absences into the system for their staff.
The base annual leave entitlement for all staff in TMS (without any additional award for service) should be 21 days.
The employee’s absence calendar can be accessed by clicking on the absence profile button shown below.
Note also top red arrow shows where you must first select the employee you want to work with.

Once loaded, the employee absence profile will display the current year’s calendar for the employee, detailing all previous and future absences.
Moving the mouse over any absence will show the details of it.
In addition, the light and dark shading on other days indicates the employees roster and if they are scheduled in or out.

To book an absence, right click on the first day of the absence and click ‘book absence’.
The screen shown below should display where the type of absence code can be selected. Also the date range can be adjusted for absences across multiple days.

Once the detail has been entered and ok’ed, the absence profile should be reloaded with the new absence in place.

If you insert an absence incorrectly by mistake, you can amend by right clicking on it and selecting ‘Change Absence Period’- If you wish to remove it completely, change the selections back to blanks.
If it is a sick absence, for the first and second day of absence (or up to 4 days for UK), a self-certification form must be completed by the employee in their TMS upon their return to work.

Upon return to work the employee must report to their Manager, who needs to notify the Payroll Administrator accordingly.
Sick leave and pay entitlements are outlined in contracts – any queries contact HR.
Any Doctors Notes or Medical Certs submitted to Line Managers are to be passed by the Line Manager to HR to file. (hard/ soft copy dependant on how they are received is fine).
Entitlements
To view employee’s entitlements, select the applicable employee from your list of employees and click on the entitlements button shown below.

This will load the entitlements screen where the user can change between the Annual Leave Lieu Time and Sick tabs. And view the Credit, Taken, Planned and Unallocated values for each entitlement.

Any Bank/Public Holidays worked should be credited as lieu. TMS will not have this information if it has not been keyed in.
Holiday entitlements in TMS can be adjusted by Managers for their Individual team members as follows:
STEP 1 - Login using your Supervisor login, Click Maintain Employee Details

STEP 2 - On the bottom left side within Panels, you will see the Entitlements. Click on that and you can choose to Edit from the top left.

Birthday code - BI
As a gesture of goodwill all staff receive their birthday or the nearest working day off.
Birthday code ‘BI’ should be used for when the employee wishes to use the day off for their birthday. This will not then affect their holiday entitlement. Everyone is entitled to use the BI code once in a year.
5. Authorising Requests
At employee level access in the system, employees can make requests for future leave (e.g. annual leave, time off in lieu etc.).
When the employees submits the leave request through the system, their manager should then receive an email automatically once the manager’s email address has been populated correctly in the employee’s personal information tab.

Managers can approve these requests in the system by accessing the authorisation list shown below. Or by using the links in the email received.

Example of email that Manager will receive for an absence request below. The manager can use the links in the email to view the request in either version of the system.

A supervisor can select the ‘edit’ button beside any of the requests and it will show the detail of the request, including the dates requested, the absence code requested and also any comments added by the employee.
The supervisor has the option to update the request from a status of ‘pending’ to either ‘ok’ or ‘rejected’.
Once this is done, the update will take effect on the employee screens and the employee will receive a notification email.
In the unusual case, where a holiday may need to be extended unexpectedly, the Supervisor can insert the holiday on the employee’s absence profile, if it is today or a future day.
If retrospective, the Supervisor will need to change the code from BH (Basic Hours worked) to holiday.
6. Absences / Overtime
Absences
Retrospective absences can be recorded in the Absence Profile
We need to accurately record the reason why the absence has occurred.
A common reason might be due to sickness.
Overtime can be recorded in the clock card as entered retrospectively

7. Adding Review Information / Reports
In Silverlight Supervisor login, go to Maintain Employee Details then select the 121 Meetings tab on the bottom left side of the screen.
Click Edit on the top left corner. Use the Blue ‘+’ for a new form. Then you should be able to type / Copy& paste the information you have there from your new 121 meeting.
Always remember to click ‘Apply’ after you have completed your input.

8. Viewing Different Employee Status e.g. Leavers
Ex-employee/ Leavers TMS profile are removed automatically from the same view as current employees when they are changed to ‘Leaver Status’.
To view your ex-employees/Leavers, change your display by clicking on Other below – Selected employee statuses.
